
90 minutes
4 portions
Medium
CALORIES (PER PORTION)
350 kcal
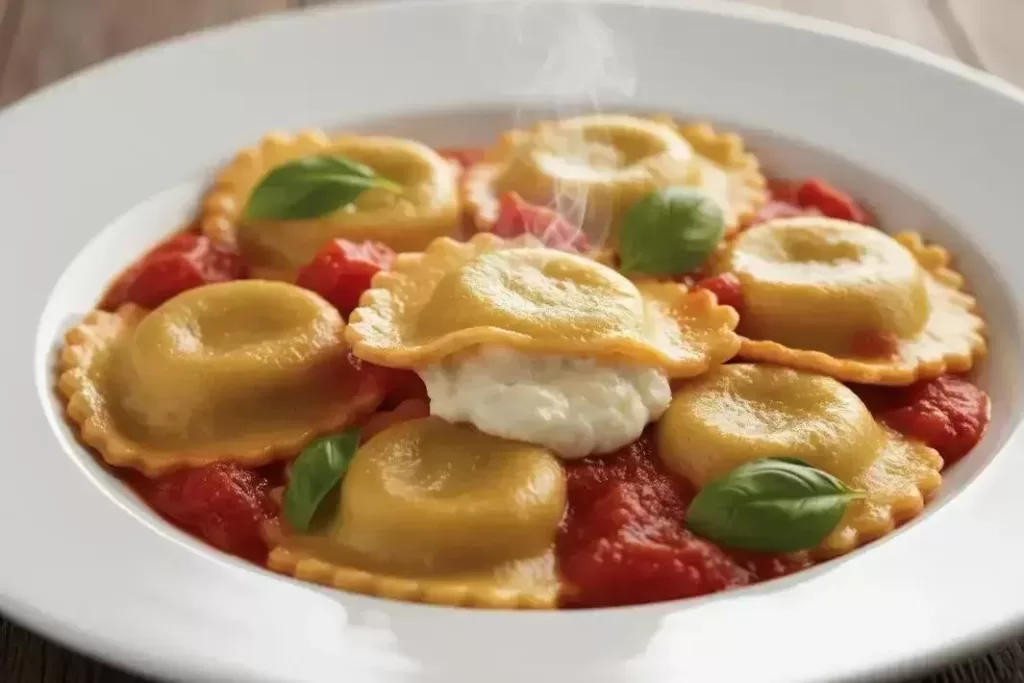
Homemade Ravioli – Discover how to prepare homemade ravioli with thin elastic dough and creamy ricotta filling, ready in 90 minutes for 4 succulent portions. Perfect for homemade Italian dinners that enchant with delicate texture and authentic flavor. Let’s surprise the family?
Ingredients for Homemade Ravioli
- 500 g of type 00 wheat flour (or all-purpose flour) – Elastic base of the dough for homemade ravioli, essential for the thin texture.
Substitution: “W” flour for greater strength or gluten-free for adapted version. - 4 large eggs (about 200 g) – Gives yellow color and malleability to the dough.
Substitution: 200 ml of water for vegan version. - 1 pinch of salt (about 5 g) – Enhances the flavor of the fresh dough.
- 1 tablespoon of extra virgin olive oil (15 ml) – Keeps the dough soft and easy to work with.
- 400 g of fresh ricotta – Classic creamy filling, main for succulent homemade ravioli.
- 100 g of grated Parmesan – Adds umami flavor and binding to the filling.
- 1 large egg – Binds the filling, preventing it from breaking apart during cooking.
- 1 pinch of grated nutmeg (optional) – Subtle aroma that elevates the cheese filling profile.
- Salt and black pepper to taste – Essential seasoning to balance flavors.
Utensils for Making Homemade Ravioli
Organizing the utensils before starting homemade ravioli makes the process easier, avoiding interruptions and ensuring a smooth flow from the dough to the final cooking, especially for those learning to make fresh pasta.
- Large glass or stainless steel bowl
- Whisk or silicone spatula
- Pasta roller or dough machine
- Large cutting board or floured surface
- Measuring spoons and sharp knife
- Kitchen brush
- Deep large pot
- Clean damp cloth
How to Make Homemade Ravioli
- Prepare the dough for homemade ravioli: In a wide bowl, place the wheat flour in a mound with a well in the center. Add the 4 eggs, pinch of salt, and olive oil. Mix with your hands or whisk until forming a homogeneous and rough dough, about 5 minutes. Transfer to the floured surface and knead for 10 minutes until smooth and elastic – the secret is developing the gluten for a resilient dough that doesn’t tear when filling. Wrap in plastic wrap and let rest for 30 minutes at room temperature, allowing the dough to hydrate and become more pliable.
- Make the creamy filling: In another bowl, mash the ricotta with a fork until creamy. Incorporate the grated Parmesan, egg, nutmeg, salt, and pepper to taste. Mix well until obtaining a uniform and firm enough paste to not leak during cooking, but soft for a succulent filling. Taste and adjust seasonings – it should have a rich and balanced fresh cheese flavor. Cover and reserve in the refrigerator for 15 minutes to firm up.
- Roll out the dough thinly: Divide the rested dough into 4 equal portions. Work with one at a time, keeping the others covered to prevent drying. Pass through the dough machine or roller, starting on the widest setting and progressing to the thinnest (about 1-2 mm thickness), lightly flouring to avoid sticking. The dough should be translucent enough to see through, perfect for Italian fresh pasta.
- Assemble the raviolis: Place a strip of rolled dough on the surface. With a spoon, deposit portions of filling (about 1 teaspoon each) every 5 cm, in a row. Moisten the edges with water using a brush. Cover with another strip of dough, pressing firmly around the filling to expel air and seal – no air bubbles to avoid explosions in the boil. Cut into individual squares with a cutter or knife, obtaining about 40-50 units for 4 portions.
- Cook the homemade ravioli: Boil a large pot with abundant water (5 liters), generous salt, and a drizzle of oil. Cook the raviolis in batches to prevent sticking, for 3-5 minutes or until they float to the surface and the dough is al dente – test by biting one to confirm firm outside and soft inside texture. Drain gently with a skimmer, without rinsing to keep the starch that helps with the sauce.
Serve immediately
Drizzle with your favorite hot sauce, like fresh tomato or butter and sage. Sprinkle Parmesan and serve for 4 hot portions. For more ideas, try our Creamy White Sauce Ravioli, a perfect combination.
Nutritional Information for Homemade Ravioli
The values below are approximate estimates per portion, calculated based on official food composition tables (such as TACO/TBCA/USDA) and may vary depending on the ingredients used.
| Nutrient | Amount per portion | % DV* |
|---|---|---|
| Calories | 350 kcal | 18% |
| Carbohydrates | 35 g | 12% |
| Proteins | 14 g | 28% |
| Total fats | 16 g | 25% |
Macronutrient distribution per portion
*% Daily Values based on a 2000 kcal diet. Values subject to variation depending on preparation methods and ingredient brands.
Tips for Perfect Homemade Ravioli
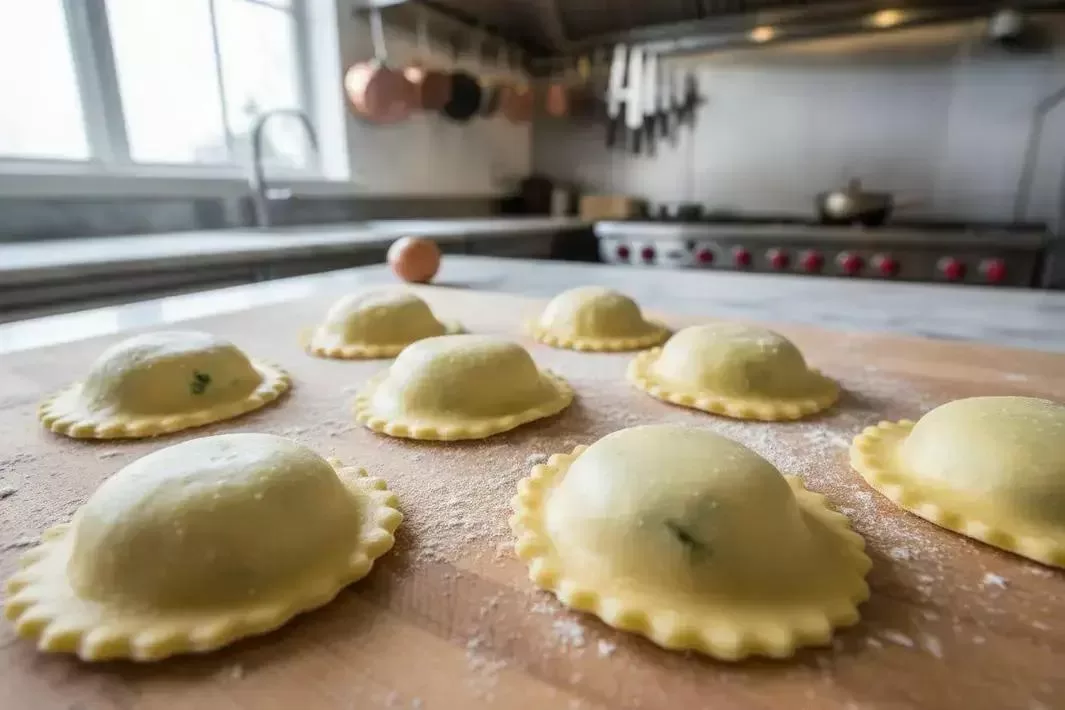
These special tips will ensure your homemade ravioli comes out perfect the first time, avoiding common mistakes like tearing dough or leaking filling. Focus on them for professional results at home.
- Always rest the dough: After kneading, let it rest for 30 minutes wrapped – this relaxes the gluten, making it easier to roll thin without breaking, a crucial point in homemade ravioli.
- Avoid air bubbles in the filling: Press the edges firmly when sealing to expel all air; bubbles cause explosions in the boil, ruining the delicate texture.
- Use type 00 or “W” flour: Flours with high protein content absorb more water, resulting in resilient and elastic dough ideal for filling without tearing.
- Test the dough thickness: It should be translucent when backlit – too thin breaks, too thick is heavy; aim for 1-1.5 mm for perfect balance in homemade ravioli.
- Cook in abundant salted water: Use 5 liters for 40 raviolis with 1 tablespoon of salt – prevents sticking and enhances the natural flavor of fresh dough.
- Filling in the fridge first: Firmness is essential; 15 minutes chilled prevents leaking when placing and cooking, keeping the creamy interior intact.
- Don’t rinse after cooking: The residual starch helps the sauce adhere better – just drain and mix immediately for unified flavor.
- Pro trick: Brush edges with beaten egg white for impeccable sealing; it resists boiling better than plain water. “Fresh dough requires patience,” says a traditional Italian chef.
Variations of Homemade Ravioli
Homemade ravioli is incredibly versatile – the basic dough adapts to any filling, allowing personalized creations for special diets, occasions, or creative flavors. Keep the dough proportions and adjust the filling for always succulent results.
- Spinach and ricotta filling: Replace part of the ricotta with sautéed spinach and chopped feta cheese; ideal for a light vegetarian version, with a Greek touch that pairs with simple tomato sauce.
- Vegan with pumpkin and nuts: Swap ricotta and eggs for baked pumpkin puree, ground Brazil nuts, and seasonings; dough made with water instead of eggs works perfectly, great for low carb.
- Ground beef Bolognese: Mix cooked ground beef with onion, tomato, and herbs in the filling; cook homemade ravioli and serve with Parmesan for a robust Italian classic. Check our elastic homemade ravioli dough for unbeatable base.
- Blue cheese and walnuts: Combine mashed gorgonzola with chopped walnuts and a touch of honey; gourmet filling that contrasts with thin dough, great for elegant dinners.
- Spicy with Calabrian sausage: Chop smoked sausage, mix with ricotta and Calabrian pepper; elevates homemade ravioli with Brazilian smoky flavor, perfect for spicy sugo sauce.
- Freezable version for parties: Assemble extra raviolis, freeze in a single layer and transfer to bag; cook straight from freezer for 5 extra minutes – yields up to 8 future portions.
- Refreshing seafood: Fill with chopped shrimp, cream cheese, and lemon; refreshing for summer, pairs with light pesto. Try ideas like lactose-free Italian sauce ravioli.
Ingredient Tips for Homemade Ravioli
Choosing fresh and quality ingredients elevates homemade ravioli to another level – prioritize well-drained ricotta to avoid excess moisture in the filling, and Italian type 00 flour, rich in gluten, that ensures elastic and thin dough. Freshly grated Parmesan releases essential oils for intense flavor, while organic eggs bring natural golden color. For nutritional balance, this combination offers creamy proteins from cheese with complex carbohydrates from the dough, making the dish satisfying and nutritious for complete meals.
Smart substitutions keep the essence: gluten-free flour (1:1) for celiacs, firm beaten tofu for ricotta in vegan version, or goat cheese for a spicy touch. Nutritionally, prioritize whole ingredients like partial whole wheat flour (reduces 10-15% refined carbs) and light ricotta (less saturated fat). Always weigh ingredients for precision, as variations affect texture and calorie count – see our nutritional table for base reference of 350 kcal per portion.
- Type 00 wheat flour: High protein (11-13%) forms strong gluten, essential for thin dough in homemade ravioli; choose fresh for better moisture absorption, avoiding hard dough.
- Fresh ricotta: Lean protein source (about 11g/100g), low in fat, adds creaminess without weighing down; whole version boosts calcium for healthy bones.
- Parmesan: Rich in umami and proteins (38g/100g), but moderate due to high sodium – opt for DOP for authentic Italian flavor without additives.
- Eggs: Bind dough and filling, adding natural lecithin for emulsifying; free-range eggs bring extra vitamins like B12 and choline for sustained energy.
- Optional nutmeg: Antioxidant that warms digestion, in small amounts balances creaminess without overwhelming.
Storage and Preservation
Fresh uncooked raviolis last 2 days in the fridge wrapped in film, but ideal to cook on the day. Cooked, consume within 24h refrigerated at 4°C. Freeze uncooked in single layer (up to 3 months), transfer to zip bag; cook straight from freezer for 5-7 extra minutes in boiling salted water – never thaw at room temperature to avoid bacterial growth. Reheat gratin in oven at 180°C for 10 minutes to revive crispiness. For practical freezer, assemble double extras and label with date.
Now that your homemade ravioli is ready, serve hot with a fresh tomato sauce or melted butter with sage, sprinkling grated Parmesan and basil leaves to enhance the artisanal flavors. The thin dough texture and creamy filling create an authentic Italian experience, perfect for savoring slowly at the table.
Ideal for romantic dinners, family meals, or gatherings with friends, this homemade ravioli turns any kitchen into a corner of Tuscany. With practice, you’ll master the technique and customize as you like, always with succulent and praised results.
Trust the step-by-step process and repeat whenever you want to delight your loved ones – simplicity and freshness guarantee success every time.
For a creamy sauce that elevates the dish, try the Creamy and Simple White Sauce Ravioli. Its velvety texture pairs perfectly with the cheese filling, creating irresistible harmony.
If you prefer an uncomplicated version for vegetarians, the Delicious and Healthy Open Broccoli Ravioli brings vegetal freshness that complements the classic homemade.
And to enhance the dough, check our Homemade and Elastic Ravioli Dough, versatile base for infinite creative creations.
Can I substitute wheat flour with gluten-free flour?
Yes, use a 1:1 gluten-free flour mix in place of all-purpose flour. Add a bit more water or xanthan gum to maintain dough elasticity. The result is similar in texture, perfect for celiacs without losing the finesse of homemade ravioli.
How do I know if the dough is kneaded to the right point?
The ideal dough is smooth, elastic, and doesn’t stick to hands after 10 minutes of kneading. It should stretch without tearing, forming a thin window when pulled. If too hard, add a little water; if sticky, more flour gradually.
Can I freeze homemade ravioli and how long does it last?
Yes, freeze uncooked raviolis in a single layer for up to 3 months in an airtight bag. Cook straight from freezer in boiling water for 5-7 extra minutes. Avoid thawing at room temperature for food safety, and refrigerate cooked for up to 2 days.
Why did my dough tear when filling? What to do?
This happens from dough too thin or without proper rest – always let it rest 30 minutes to relax the gluten. Roll to 1-1.5 mm thickness and press out air well when sealing. Next time, test with less filling per unit to avoid excess pressure.
How many portions does this recipe yield and can I double it?
Yields about 40-50 units for 4 generous portions. Double ingredients proportionally without changing the process, keeping kneading and cooking times the same. Adjust boiling water for more batches and avoid overcrowding the pot.
Do I need a dough machine or does a rolling pin work?
A manual rolling pin works perfectly for beginners, just patience for uniformity. Pass repeatedly flouring to reach 1-2 mm. Machine speeds up for pros, but rolling pin preserves traditional artisanal texture in homemade ravioli.
Did you like this recipe?
If you liked it, share with your friends and family!

- Juicy Bauru Sandwich with Homemade Roast Beef - 17 de March de 2026
- Refreshing Flavored Water with Fruits and Herbs - 17 de March de 2026
- Creamy and Easy Classic Can Mousse - 11 de March de 2026