
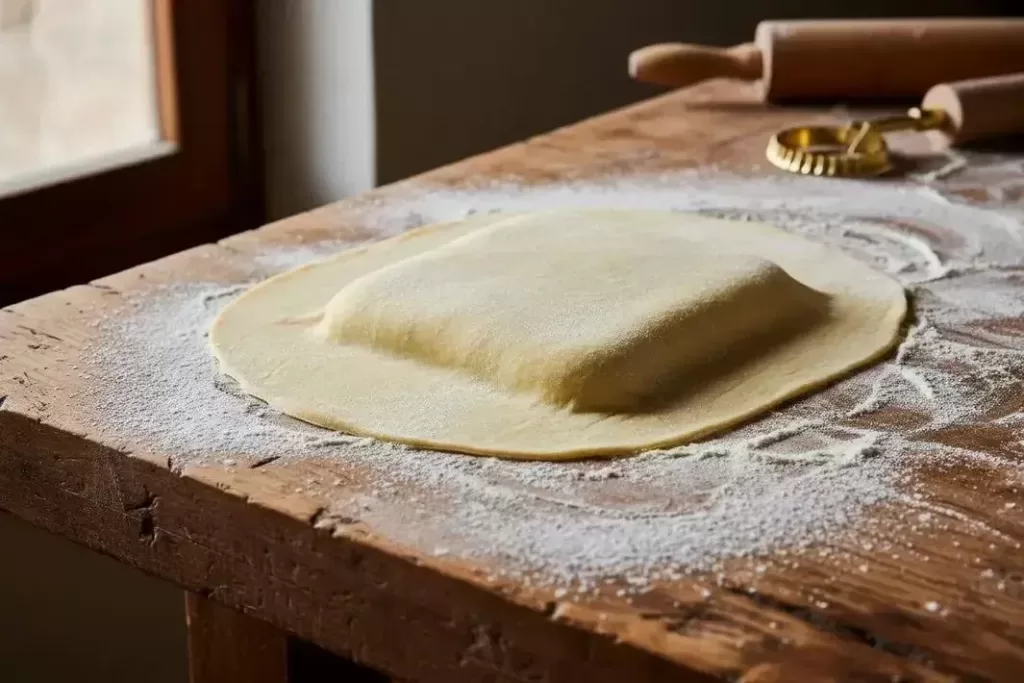
40 minutes
4 servings
Easy
CALORIES (PER SERVING)
408 kcal
Few things surpass the pleasure of preparing fresh dough at home, evoking memories of cozy family meals. The **ravioli dough** is versatile and perfect for those seeking authentic flavors. In this recipe, you will learn to make an elastic and thin dough, ideal for various fillings, yielding 4 servings in just 40 minutes. Get ready to surprise with homemade Italian dishes!
Ravioli Dough – Discover how to make homemade elastic and thin ravioli dough in just 40 minutes for 4 generous servings. With sifted flour, egg yolks and warm water, knead until soft and roll out translucent for perfect fillings. Authentic Italian result that’s irresistible! Ready to try?
Ravioli Dough Ingredients
- 3 cups (tea) sifted all-purpose flour (360g) – Forms the elastic base of the ravioli dough, ensuring a thin and uniform texture.
Substitution: Semolina flour for a more rustic version. - ½ teaspoon sea salt (3g) – Enhances the natural flavor of the dough without overwhelming.
Substitution: Common refined salt, in equal measure. - 4 egg yolks – Adds richness and elasticity, helping with the cohesion of the ravioli dough.
Substitution: For a vegan version, use 4 tablespoons of cold water mixed with flour to simulate. - Warm water to taste (about 120ml) – Hydrates gradually to soften the dough without making it sticky.
Utensils for Making Ravioli Dough
Organizing the necessary utensils before starting the ravioli dough preparation facilitates the process, avoiding unnecessary pauses and ensuring a smooth flow in the kitchen. With everything at hand, you can focus on the elastic texture of the dough.
- Wooden table or floured surface
- Fine sieve
- Clean hands or wooden spoon
- Rolling pin
- Sharp knife or dough cutter
- Bowl or plastic wrap
How to Make Ravioli Dough
Preparation Method
- Flour preparation: Place the sifted all-purpose flour on a clean and wide surface, like a wooden table, forming a central mound. This helps incorporate air and avoid lumps, facilitating the formation of a uniform and light ravioli dough. Sieving is essential for a soft final texture.
- Forming the well and adding ingredients: Create a hole in the center of the flour mound. Place the raw egg yolks directly there, without mixing them beforehand, and add the sea salt. The yolks contribute to the elasticity of the dough without adding excessive moisture, which is ideal for keeping it firm during handling.
- Incorporating the water: Start adding warm water little by little, about one tablespoon at a time, using your hands to mix the ingredients in the center of the well. Continue until the mixture begins to come together, forming an initially hard dough. This gradual addition prevents the dough from becoming sticky, ensuring it absorbs the liquids in a balanced way for a pliable consistency in about 5-7 minutes.
- Kneading the dough: Press and stretch the dough vigorously with your hands or on the surface, incorporating all the flour little by little. Knead for about 10 minutes until it becomes smooth, soft and elastic – the dough should retract slightly when pulled, indicating gluten development. This step is crucial for the ravioli dough to withstand the filling without breaking during shaping.
- Dough rest: Form a ball with the kneaded dough, cover with a damp cloth or plastic wrap and let it rest at room temperature for 10 minutes. This time allows the gluten to relax, making the dough easier to roll out and avoiding tears, completing this phase around 20 minutes total so far.
- Rolling out the dough: Divide the dough into smaller portions if necessary and, on a lightly floured surface, use a rolling pin to stretch each part until you get a very thin and translucent sheet, almost like paper. Rotate the dough occasionally for uniformity; this should take about 5 minutes and is the key moment for a delicate ravioli dough that doesn’t break when cooking.
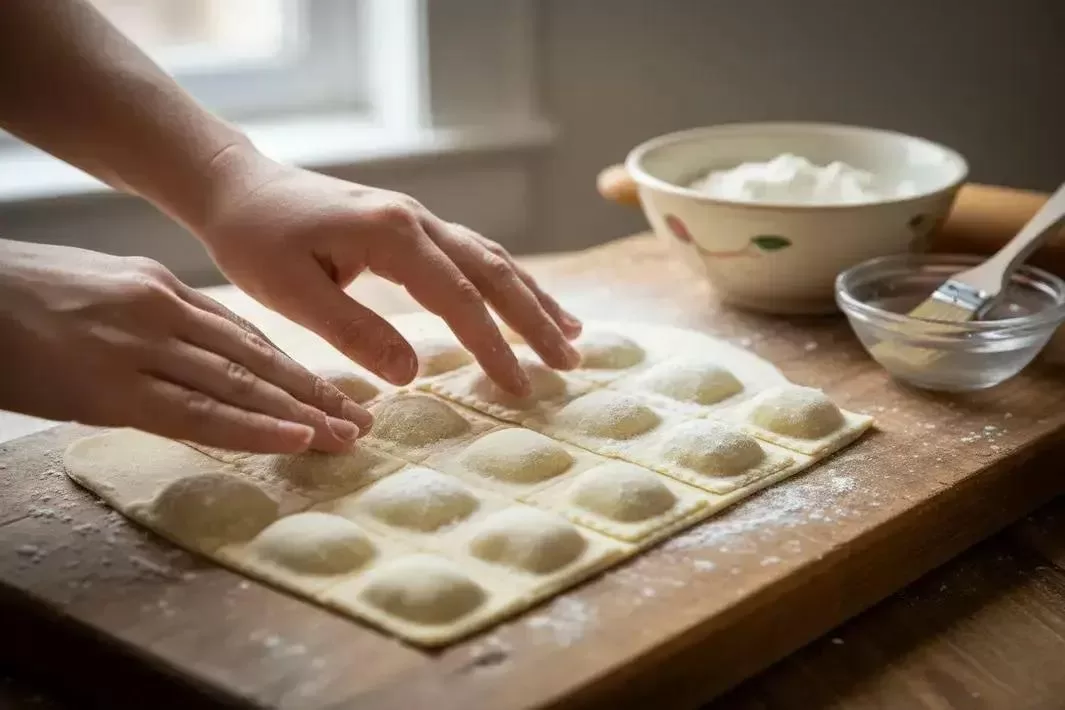
- Cutting and filling: Cut the rolled out dough into circles or squares about 7-10 cm. Place a small portion of filling in the center of each piece, moisten the edges with a little water using your fingers and close by pressing the ends to seal, expelling excess air. Avoid overfilling to prevent leaks during cooking, a step that can be done for 4 servings in the final 10 minutes.
Important tip: If opting for the sheet version, divide the dough into two equal parts after resting, position filling balls 5 cm apart on one of them, cover with the other thin sheet, press around to seal and cut into squares. Always moisten the edges for perfect adhesion, ensuring raviolis that cook evenly in salted boiling water for 3-5 minutes until they float to the surface.
Nutritional Information for Ravioli Dough
The values below are approximate estimates per serving, calculated based on official food composition tables (such as TACO/TBCA/USDA) and may vary depending on the ingredients used.
| Nutrient | Amount per serving | % DV* |
|---|---|---|
| Calories | 408 kcal | 20% |
| Carbohydrates | 72 g | 24% |
| Proteins | 13 g | 26% |
| Total fats | 5 g | 9% |
Macronutrient distribution per serving
Tips for Perfect Ravioli Dough
These special tips will help you master the ravioli dough, avoiding common mistakes and ensuring a perfect texture for filling and cooking. With attention to these details, your preparation will be foolproof, especially in 40 minutes for 4 servings.
- Ideal temperature water: Use warm water, between 35-40°C, to activate the gluten without prematurely cooking the yolks. Water that’s too hot can make the dough sticky; test with your finger for comfort, adjusting gradually for smooth incorporation.
- Avoid excess flour at the start: When sifting, don’t add more than necessary after mixing; dry dough results in brittle raviolis. If it becomes hard, incorporate minimal moisture and knead slowly for elasticity without cracks.
- Vigorous kneading: Press and fold the dough repeatedly for at least 10 minutes, until it stretches without tearing – this develops the gluten, essential for thin and filling-resistant ravioli dough. Feel the softness when pressing lightly.
- Mandatory rest: Don’t skip the 10 minutes of rest under a damp cloth; feel the difference in pliability when rolling out, as it relaxes the proteins, preventing contractions that tear the thin layer during shaping.
- Lightly floured surface but subtle: Flour the surface just enough to prevent sticking; excess makes the dough dry and rough. Clean and re-flour between sheets to maintain uniform thickness below 1mm, visible as translucent.
- Proper moisture sealing: Moisten edges with a finger dipped in pure water, not excessively, to stick without trapped air; bubbles cause leaks when cooking. Press firmly, checking adhesion before cooking for 3-5 minutes in salted boiling water.
- Cooking test: Cook an empty dough piece first to check time; it floats when ready, indicating al dente point without overcooking that softens the structure. Adjust salt in the water for balanced flavor in your 4 servings.
Ravioli Dough Variations
The versatile ravioli dough allows countless adaptations while maintaining its elasticity and simplicity, ideal for creative fillings in 40 minutes for 4 servings. Try these tested variations for specific diets or innovative flavors, always following the base method for perfect texture.
- Whole wheat ravioli dough: Replace 1 cup of regular flour with whole wheat flour, adding more 10ml of water if necessary. Results in extra fiber for nutritious meals, perfect for whole wheat gnocchi or rustic raviolis with pumpkin filling.
- Egg-free vegan version: Swap the yolks for 120ml of ice-cold water with 1 tablespoon of olive oil and 1 teaspoon of xanthan gum. Mix vigorously to emulate elasticity, ideal for vegetable fillings like spinach, yielding the same amount for plant-based diets.
- Spinach-colored dough: Add 50g of cooked and blended spinach to the yolks, adjusting flour if too moist. It becomes vibrant green for visual raviolis, pairing with light cheeses; technique maintains thinness without changing preparation time.
- Beetroot dough for pink: Incorporate puree from 1 small medium beetroot (cooked) into the yolks, sifting extra flour as needed for adhesion. Natural pink color elevates presentation for parties, compatible with sweet or savory fillings in 4 servings.
- Gluten-free dough: Use rice flour with potato starch (2:1 ratio, total 360g), adding 1 tablespoon of psyllium for binding. Extra kneading ensures cohesion; great for gluten-free ravioli with ricotta filling.
- Dough for freezing: After rolling out, cut and fill without cooking; freeze in a single layer and transfer to a bag for up to 2 months. Cook straight from the freezer adding 1-2 minutes, preserving texture for advance preparations in family meals.
These changes maintain the simple essence of the ravioli dough, allowing personalization without complicating the original process.
Ingredient Tips for Ravioli Dough
The right choice of ingredients elevates the ravioli dough to a professional level, balancing flavor and texture in just 40 minutes for 4 servings. Opt for high-quality, fresh and fine all-purpose flour for elastic gluten without lumps; organic yolks rich in lecithin improve natural cohesion. Sea salt adds subtle trace minerals, while warm water facilitates absorption. These elements promote not only elasticity, but also a moderate nutritional profile in energetic carbohydrates and moderate proteins, with low fat from the eggs, ideal for light and versatile dishes.
Smart substitutions maintain accessibility: Italian tipo 00 flour for purism, or 20% whole wheat for extra fiber without compromising softness. For gluten-free, mix rice flour with guar gum; vegans use whipped aquafaba from legumes. Always weigh precisely, as balanced hydration-rich gluten defines success in paper-thin dough.
- Sifted all-purpose flour: Structural base, provides gluten for elasticity; choose without bleaches for purity, avoiding dryness.
- Egg yolks: Unify dough with natural lecithin, adding proteins that keep ravioli intact during al dente cooking.
- Sea salt: Enhances flavor without excess, potassium and magnesium minerals aid balanced hydration for smooth texture.
- Warm water: Filtered and warm activates flour enzymes, preventing thermal shocks; mineralized alternative elevates ions for superior gluten.
- General nutritional profile: Rich in complex carbohydrates for sustained energy, moderate proteins support muscle repair, low fats favor light digestion – about 408 kcal per serving.
Storage and Preservation
Fresh ravioli dough lasts 2 days wrapped in plastic wrap in the refrigerator (4°C), maintaining elasticity; avoid freezing raw due to gluten loss, but filled frozen in a single layer lasts 3 months at -18°C – thaw in refrigerator overnight, cook straight in salted boiling water adding 1 extra minute for firm texture. Reheat under steam avoiding microwave that hardens; leftovers last 1 day in refrigerator, rejuvenating with a 30s hot bath.
Now that your ravioli dough is ready, serve it fresh with melted butter, sage and grated parmesan cheese to highlight the elastic and thin texture. For a more robust sauce, try homemade tomato or pesto, accompanying with a simple green salad to balance the family dish, yielding perfectly 4 generous servings in 40 minutes of pure culinary pleasure.
This dough shines in intimate Italian dinners, themed parties or everyday meals elevated to gourmet, surprising with simplicity and authentic flavor. With practice, it becomes a foolproof base for creative fillings, ensuring raviolis that melt in your mouth.
To inspire next creations, pair with the Creamy and Delicious Gratinated Ravioli, a luxurious filling that enhances the fresh dough. Or test in the Delicious and Easy Open Broccoli Ravioli, light and vegetarian for healthy flavor variations.
Even more versatile, adapt for the Whole Wheat Pumpkin Ravioli with Crunchy Walnuts, adding autumnal texture that pairs perfectly with the base dough’s elasticity.
Can I substitute the egg yolks?
Yes, for a vegan or egg-free version, use 120 ml of cold water with 1 tablespoon of olive oil, adding little by little as the recipe indicates. This maintains the dough’s elasticity, though it requires extra kneading for 2 minutes to compensate for the lack of lecithin. The result is similar, ideal for various fillings in 4 servings.
How do I know if the dough is ready to knead?
The dough should form a cohesive well after incorporating all the flour and water, initially hard and then soft after kneading for 10 minutes. It becomes elastic when stretched without tearing and retracts slightly when released. If it still sticks to your hands, flour the surface lightly and continue working until smooth and uniform.
Can I prepare the dough in advance? How long does it last in the refrigerator?
Yes, after kneading and resting, wrap in plastic wrap and store in the refrigerator for up to 2 days without losing elasticity. Roll out thin when using, flouring lightly. To freeze filled, store for 3 months at -18°C and cook straight from the freezer with 1 extra minute, totaling preparation in 40 minutes.
My dough turned out dry or cracked. What to do?
This happens due to excess flour or water that’s too cold; adjust by adding warm water drop by drop during kneading until regaining softness. Always sift and mix gradually for even hydration. Next time, knead vigorously and rest 10 minutes to relax the gluten, avoiding cracks when rolling.
How many servings does this recipe yield and can I double it?
It yields exactly 4 generous ravioli servings, with enough dough for moderate fillings. To double, multiply ingredients by 2, keeping kneading and resting the same to avoid overload. The time remains 40 minutes, scaling perfectly for more people.
Do I need a pasta machine or is a rolling pin enough?
No need for a machine; a regular rolling pin rolls out thin enough for translucent dough on a floured table. Rotate the dough with each roll for uniformity below 1 mm. If preferred, a machine makes it easier, but manual preserves the homemade elastic texture without complications.
Did you like this recipe?
If you liked it, share it with your friends and family!

- Juicy Bauru Sandwich with Homemade Roast Beef - 17 de March de 2026
- Refreshing Flavored Water with Fruits and Herbs - 17 de March de 2026
- Creamy and Easy Classic Can Mousse - 11 de March de 2026